Tutorial
The following tutorial uses a demo application to walk through the setup and use of blprnt. Follow the installation instructions before beginning.
-
Get the Demo Application
Clone the example app at https://github.com/blprnt-org/guess-demo.
$ git clone https://github.com/blprnt-org/guess-demo.git -
Launch blprnt
To launch blprnt as a specification viewer just point it at a directory of markdown. The requirements for the file layout are:
- the directory should contain a single markdown file
- all subdirectories must contain a markdown file with the same name as the directory
E.g.
/my great specification
   index.md
   /featureA
      featureA.md
      featureB.md
To view the specification for the number guessing game example app, change to the
guess-demo/GuessingGame/Guessing Game Specificationdirectory and:$ blprnt preview
The specs directory is rendered as a webpage, with the table of contents showing the hierarchy of markdown documents.
-
Verify the Specification
The real power of blprnt is that each statement in the specification has been verified by a corresponding automated test (which we ran earlier).
This time, run blprnt with a path to the test results that verify the specification:
blprnt preview --tests "../../GuessingGameTests/testresults"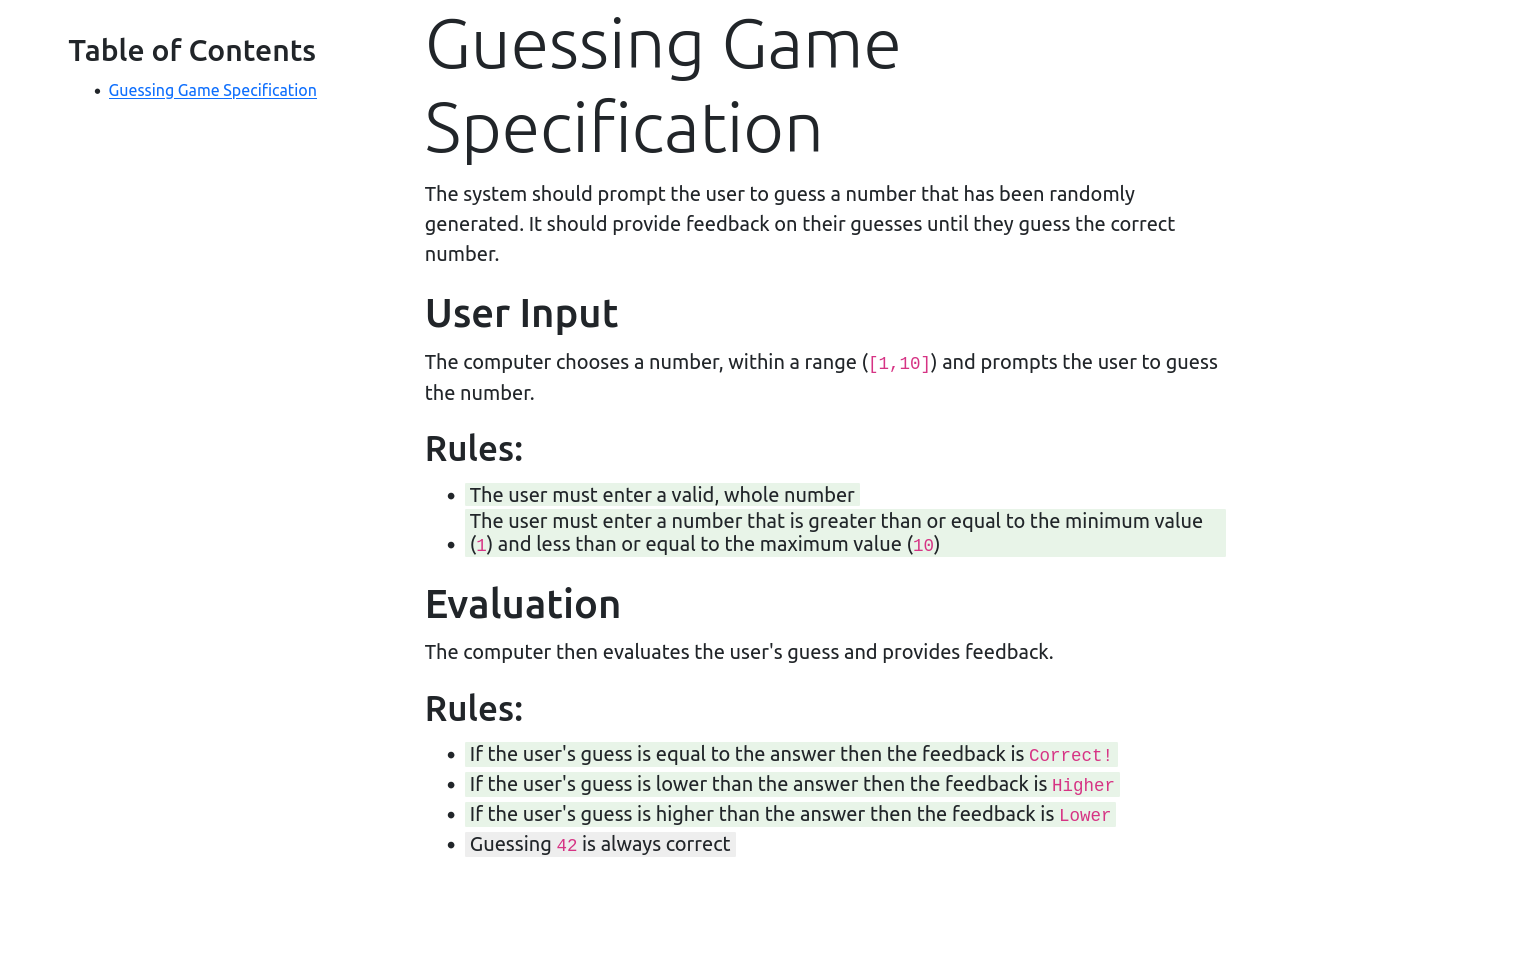
Each assertion in the specification has been checked by automated tests. The green color of the highlight indicates that those statements were successfully verified. The gray color of the last statement indicates that its test is currently skipped. Hover your mouse over a statement for more detail.
Read more at Making living specifications work