blprnt
Know what software does, what it should do, and what are the differences.
blprnt is a tool for creating and verifying software specifications. Each assertion in your specification can be linked to a test and verified automatically.
Specs are written in markdown. Tests are written in your testing tool of choice. blprnt puts them together.
- Reduce rework
- Improve collaboration
An Example of a Verified Specification
Benefits
- Help teams to think about what to build before building it.
- Maintain an accurate specification of software systems as a basis for ongoing development.
Features
- Specification creation and browsing.
- Verification of assertions in specifications.
Installation
-
Install the .NET SDK for your system.
-
Install the blprnt .NET tool.
$ dotnet tool install --global blprnt -
Run
blprntand verify that it works.$ blprnt Required command was not provided. Description: Client for Blprnt living specification server Usage: blprnt [command] [options] Options: --version Show version information -?, -h, --help Show help and usage information Commands: preview Local preview of a spec
If you already have a specification, see viewing a specification.
Tutorial
The following tutorial uses a demo application to walk through the setup and use of blprnt. Follow the installation instructions before beginning.
-
Get the Demo Application
Clone the example app at https://github.com/blprnt-org/guess-demo.
$ git clone https://github.com/blprnt-org/guess-demo.git -
Launch blprnt
To launch blprnt as a specification viewer just point it at a directory of markdown. The requirements for the file layout are:
- the directory should contain a single markdown file
- all subdirectories must contain a markdown file with the same name as the directory
E.g.
/my great specification
   index.md
   /featureA
      featureA.md
      featureB.md
To view the specification for the number guessing game example app, change to the
guess-demo/GuessingGame/Guessing Game Specificationdirectory and:$ blprnt preview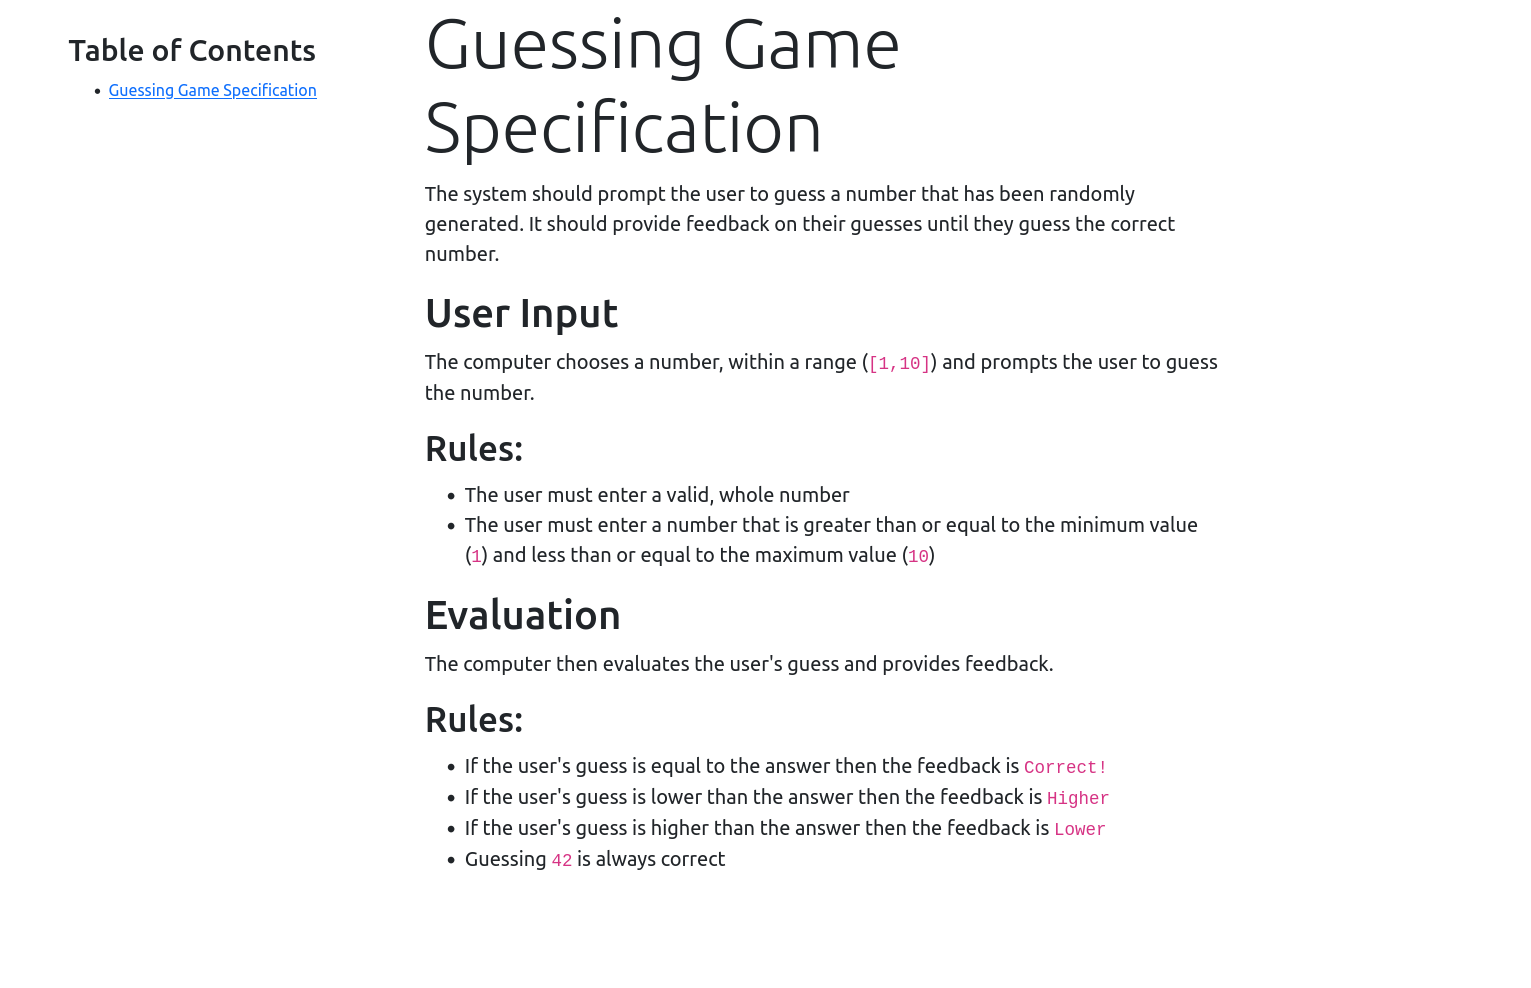
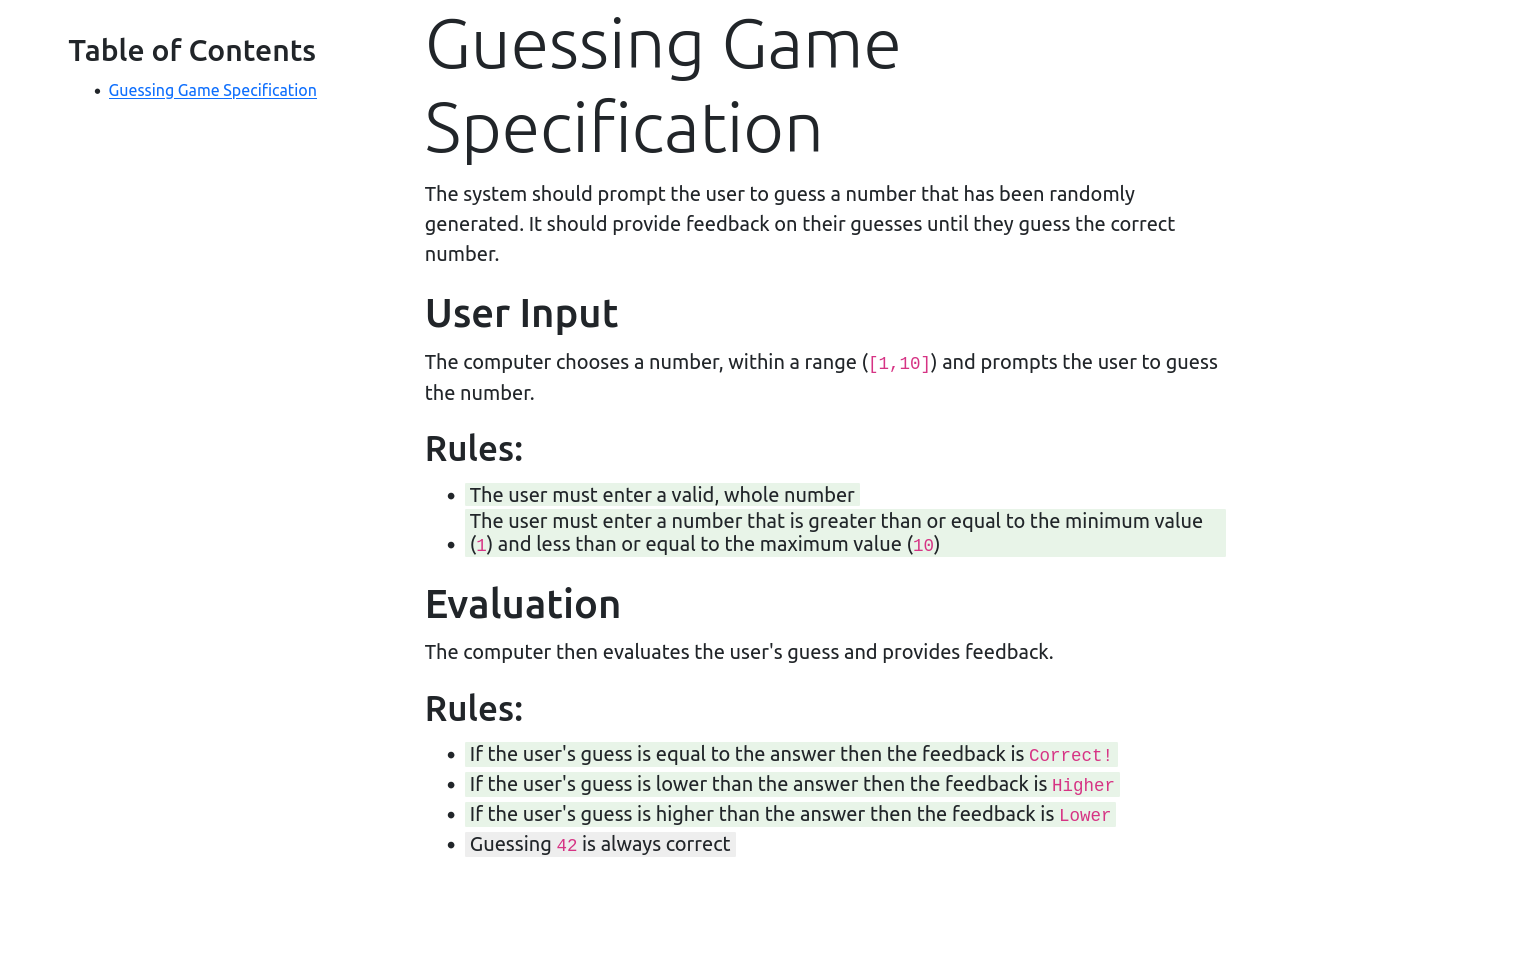
The specs directory is rendered as a webpage, with the table of contents showing the hierarchy of markdown documents.
-
Verify the Specification
The real power of blprnt is that each statement in the specification has been verified by a corresponding automated test (which we ran earlier).
This time, run blprnt with a path to the test results that verify the specification:
blprnt preview --tests "../../GuessingGameTests/testresults"
Each assertion in the specification has been checked by automated tests. The green color of the highlight indicates that those statements were successfully verified. The gray color of the last statement indicates that its test is currently skipped. Hover your mouse over a statement for more detail.
Read more at Making living specifications work
Writing a Specification
Each blprnt specification is a directory of markdown files.
It could be a directory with a single file, or it could be a deeply nested hierarchical structure with hundreds of directories and thousands of markdown files.
Restaurant example
Imagine you are writing a specification for a restaurant. You start with a directory with a single document representing the specification. The file name should match the name of the directory. This is the title page of your specification:
/restaurant-specification
   restaurant-specification.md
You can add other files to a directory and they become sub-sections. Or you can add sub-sections by adding a subdirectory containing a file with the same name as the directory.
The restaurant will serve food, so you add a directory for food related specification.
/restaurant-specification
   restaurant-specification.md
   /food
      food.md
The restaurant will serve many cuisines, including burgers, so you add a sub-section for burgers:
/restaurant-specification
   restaurant-specification.md
   /food
      food.md
      burgers.md
The rendered specification will have a table of contents like:
Table of Contents
- restaurant specification
- food
- burgers
What to put in a Specification
How you write and organise your specification is up to you.
Verifying your specification will be easier if your specification consists of assertions that are:
- clear
- mutually exclusive (don't repeat yourself)
- collectively exhaustive (don't miss anything)
Thus, it often makes sense to use lists in a specification.
See the Guessing Game Demo for a simple working specification.
Markdown Formatting
Markdown is a way of defining formatted text using plain text. Because it is plain text it is excellent for producing text that can be manipulated by a computer program such as blprnt.
View the markdown reference for formatting syntax. Some simple formatting syntax is described below.
Headings
To create a heading prefix a line with one or more #. The more #, the smaller the heading.
# Big Heading
## Smaller Heading
### Smaller Heading
Big Heading
Smaller Heading
Smaller Heading
Lists
* first
* second
* third
- first
- second
- third
Viewing a Specification
To view a specification
-
Change to a directory containing:
- a single markdown file OR
- a markdown file with the same name (plus .md) as the directory
E.g.
/restaurant-specification restaurant-specification.md -
Launch blprnt
$ blprnt preview -
Open a browser to
http://localhost:5000
The location of the specification directory can alternatively be specified as the command line argument specs:
$ blprnt preview --specs "/Users/bill/restaurant-specification"
Verifying a Specification
In a verified specification, each assertion is linked to an automated test that verifies that assertion.
The automated tests can be created with any testing library, and run with any test runner, so long as the output file is in one of the formats that blprnt understands.
To verify a specification:
-
Identify an assertion to verify.
The Guessing Game Demo specification includes the assertion
The user must enter a valid, whole number. -
Write a test that verifies the assertion.
The Guessing Game Demo
UserInputTestsincludes a testWholeNumbersInRangeAreValidthat verifies the valid, whole number assertion (this is C# and the xUnit testing framework):[Fact] public void WholeNumbersInRangeAreValid() { foreach (var i in Enumerable.Range(1, 10)) { Assert.NotNull(_engine.Parse(i.ToString())); } } -
Link the specification assertion to it's test.
There are two types of document selections that can be linked to tests.
Block Containers
Block containers are delimited by
:::followed by a new line. For example,::: Block markdown content :::Inline Containers
Inline containers are delimited by
::, and occur inline.This paragraph contains ::an inline container:: as well as some other text.To link a container, block or inline, to a test add metadata to the closing delimiter. The metadata format is
{grep='NameOfTestGoesHere'}. If your test output file includes a test with a name that containsNameOfTestGoesHerethen it will be linked to the container.This paragraph ::contains an inline container::{grep='NameOfTestGoesHere'} as well as some other text.The verified specification:

Creating Automated Tests
Test Output Files
Creating Tests with .NET
https://github.com/blprnt-org/guess-demo and add a ms test version.
Creating Tests with node.js
Do a node version of https://github.com/blprnt-org/guess-demo with examples in mocha and jest.